How to Make DIY Birthday Decorations
Creating a festive atmosphere for a birthday celebration does not invariably require expensive, store-bought decorations. Engaging in do-it-yourself (DIY) projects provides a personalized touch, allows for budget control, and can be a rewarding experience. This article elucidates various techniques and provides detailed instructions for crafting impressive birthday decorations using readily available materials.
Creating Personalized Banners and Garlands
Banners and garlands are foundational elements of birthday décor, capable of transforming any space into a celebratory environment. These decorations can be tailored to the birthday person's preferences and the overall theme of the party.
Materials Required: * Cardstock or construction paper in various colors * Scissors or a cutting machine (e.g., Cricut, Silhouette) * Hole punch * Twine, ribbon, or string * Markers, pens, or paint * Optional: Stencils, glitter, glue
Banner Construction: 1. Design and Cut: Determine the desired shape for the banner flags. Common shapes include triangles, rectangles, and pennants. Stencils can be used to ensure uniform shapes, or a cutting machine can be employed for more intricate designs. Cut out the desired number of flags from the cardstock. 2. Lettering and Embellishments: Using markers, pens, or paint, write the desired message on the flags. This could be "Happy Birthday," the birthday person's name, or a thematic phrase. For a more visually appealing design, consider using different fonts and colors. Embellishments such as glitter, stickers, or stamped images can be added. 3. Assembly: Punch holes in the top corners of each flag. Thread the twine, ribbon, or string through the holes, ensuring that the flags are evenly spaced. Adjust the spacing as needed to achieve the desired look. The banner is now ready to hang.
Garland Construction: Garlands offer versatility in design and can be made from various materials, including paper, fabric, and balloons.
Paper Garland: Cut out shapes such as circles, stars, or hearts from colorful paper. These shapes can be strung together using a needle and thread or glued onto a length of ribbon or string. Consider varying the sizes and colors of the shapes for a more dynamic appearance.
Fabric Garland: Cut strips of fabric in various colors and patterns. Tie these strips onto a length of twine or ribbon, creating a ruffled effect. This type of garland adds texture and visual interest to the décor.
Balloon Garland: Inflate balloons in different sizes and colors. Tie the ends of the balloons together in clusters. Attach the clusters to a length of fishing line or sturdy string, overlapping them to create a full and voluminous garland. Balloon garlands are particularly effective for creating a grand entrance or backdrop.
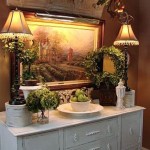
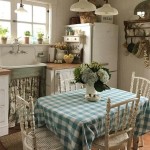
Creating Centerpieces and Table Decorations
Centerpieces and table decorations enhance the dining or display areas, contributing to the overall aesthetic of the birthday celebration. DIY centerpieces offer the opportunity to create unique and personalized focal points.
Materials Required: * Glass jars, vases, or containers * Flowers (fresh or artificial) * Candles (pillar or votive) * Decorative stones, sand, or pebbles * Ribbon, twine, or lace * Optional: Photos, small figurines, thematic elements
Floral Centerpieces: Arrange fresh or artificial flowers in a vase or jar. For a more rustic look, wrap twine or burlap around the container. Consider using flowers that are the birthday person's favorite color or that match the party's theme. Add greenery to fill out the arrangement and create a more natural look. For longer lasting floral arrangements, consider using dried or preserved flowers, often available at craft or floral supply stores.
Candle Centerpieces: Place candles of varying heights on a decorative tray or plate. Surround the candles with decorative stones, sand, or pebbles. For added visual appeal, wrap ribbon or lace around the base of the candles. Be sure to use caution when working with open flames and never leave unattended candles.
Thematic Centerpieces: Create a centerpiece that reflects the birthday person's interests or the party's theme. For example, if the birthday person enjoys reading, stack books and top them with a small potted plant or a figurine. If the party has a nautical theme, fill a glass jar with sand, seashells, and a miniature sailboat.
Table Confetti: Cut out small shapes from colorful paper or cardstock. Scatter these shapes on the table around the centerpieces and place settings. Table confetti adds a touch of whimsy and visual interest to the tablescape.
Photo Displays: Print out photographs of the birthday person at various ages and stages of life. Arrange the photos on the tables or create a photo collage. Include captions or anecdotes to add a personal touch. This serves as a nostalgic element and a conversation starter for guests.
Crafting Wall Decorations and Backdrops
Wall decorations and backdrops provide a visually impactful backdrop for photographs and create a festive atmosphere. DIY wall decorations can be customized to fit any space and budget.
Materials Required: * Balloons * Crepe paper streamers * Fabric * Paper plates * Paint * Glue * Tape or tacks * Optional: Fairy lights, pom-poms, paper flowers
Balloon Wall: Inflate balloons in various sizes and colors. Attach the balloons to a large piece of cardboard or directly to the wall using tape or tacks. Create a dense and colorful balloon wall that serves as a backdrop for photographs. Consider using a balloon arch kit for a more structured and professional-looking balloon wall. Balloon arches typically involve using a plastic strip with holes to attach the balloons, creating a consistent form.
Crepe Paper Streamer Backdrop: Hang crepe paper streamers from the ceiling or a horizontal support. Alternate colors and textures to create a visually appealing backdrop. Twist the streamers for added dimension. This is a cost-effective and easy way to transform a blank wall into a festive focal point.
Fabric Backdrop: Drape fabric over a frame or suspend it from the ceiling. Use a variety of colors and textures to create a visually interesting background. Add embellishments such as fairy lights, pom-poms, or paper flowers. A fabric backdrop is a versatile option that can be customized to match any theme.
Paper Plate Decorations: Paint paper plates in various colors and designs. Attach the plates to the wall in a pattern or arrangement. This is a simple and inexpensive way to create a colorful and whimsical wall decoration. Paper plates can also be cut and folded into various shapes, such as fans or flowers, for added visual interest.
Photo Booth Backdrop: Create a designated photo booth area with a backdrop that complements the party's theme. Use a combination of the above techniques to create a fun and interactive space for guests to take photos. Props such as hats, masks, and signs can be added to enhance the photo booth experience. Consider using instant cameras to allow guests to take home their photos as party favors.
By implementing these detailed instructions and incorporating personalized touches, one can successfully create a memorable and visually appealing birthday celebration through the art of DIY decorations. The key is to allow ample time for preparation, consider the birthday person's preferences, and embrace the creative process.

31 Amazing Diy Party Decorations To Make Hobbycraft

10 Easy Diy Birthday Decorations Cute Homemade Party Decor

14 Easy And Fun Diy Party Decorations For Every Event Stationers

21 Diy Birthday Decoration Ideas At Home Cute Party Decor

10 Easy Diy Birthday Decorations Cute Homemade Party Decor

39 Easy Diy Party Decorations Birthday

Homemade Party Decorations How To Make Birthday More Than A Mummy

39 Easy Diy Party Decorations

Easy Diy Party Decorations Pump It Up

Mybabydoo Com Paper Fan Decorations Diy Birthday Party
Related Posts