Picture Wall Room Decor: A Comprehensive Guide
Picture walls, also known as gallery walls, represent a dynamic and personalized element in interior design. They offer a versatile approach to showcasing memories, artwork, and personal interests, thereby transforming a blank wall into a compelling focal point. The arrangement of photographs, prints, and other decorative items can significantly impact the ambiance of a room, reflecting the homeowner's individual style and creating a visually stimulating environment. The execution of a successful picture wall involves careful planning, strategic selection of materials, and a keen eye for composition.
Planning and Preparation
Before initiating the physical installation of a picture wall, meticulous planning is essential to ensure a cohesive and visually appealing result. This planning phase encompasses several critical steps, including selecting a suitable wall, determining the overall aesthetic, gathering necessary materials, and creating a preliminary layout.
The choice of wall is a significant factor. Walls that are centrally located within a room or serve as a backdrop to a main furniture piece, such as a sofa or bed, are often ideal candidates. Consider the wall's dimensions and its relationship to existing architectural features, such as windows, doors, or fireplaces. The color of the wall also plays a crucial role; a neutral color palette provides a versatile canvas, while darker hues can create a more dramatic effect.
Defining the overall aesthetic is equally important. This involves considering the desired mood and style of the picture wall. Options range from a cohesive and uniform look, characterized by matching frames and consistent color schemes, to a more eclectic and informal arrangement, incorporating diverse frame styles, sizes, and subject matter. Consider the existing décor of the room and aim for a picture wall that complements the overall design scheme.
Gathering the necessary materials is another critical step. This includes selecting the photographs, prints, artwork, or other decorative items that will be included in the picture wall. Ensure that you have high-quality prints and that any necessary restoration or retouching has been completed. Consider the size and orientation of each piece and select frames that are appropriate for the chosen aesthetic. In addition to the visual elements, gather essential tools such as a measuring tape, level, pencil, hammer, nails or screws, and picture hanging hardware.
Creating a preliminary layout is a crucial step to visualize the final arrangement before committing to hanging anything on the wall. One effective method is to trace the outline of each frame on paper and then experiment with different arrangements on the floor or on a large table. This allows you to adjust the spacing, balance, and overall composition of the picture wall without damaging the wall itself. Consider factors such as symmetry, asymmetry, and the placement of visually heavier or lighter elements.
Selection and Arrangement of Elements
The selection and arrangement of elements within a picture wall significantly impact its overall impact and aesthetic appeal. Careful consideration should be given to the types of images or objects included, the framing choices, and the spatial arrangement on the wall.
Variety in the types of images or objects can add visual interest and prevent the picture wall from appearing monotonous. Consider including a mix of photographs, prints, artwork, and even three-dimensional objects such as small sculptures or decorative mirrors. Photographs can range from personal snapshots and family portraits to travel photographs and artistic compositions. Prints can include reproductions of famous artworks, botanical illustrations, or abstract designs. The inclusion of personal items, such as postcards, concert tickets, or pressed flowers, can add a unique and sentimental touch.
Framing choices play a vital role in defining the style and cohesiveness of the picture wall. Matching frames can create a uniform and sophisticated look, while a mix of frame styles can add character and visual interest. Consider the color, material, and style of the frames in relation to the images they contain and the overall décor of the room. Simple, minimalist frames are often a good choice for contemporary spaces, while more ornate or vintage frames can complement a traditional aesthetic. The use of mats can also enhance the presentation of the images and provide visual breathing room between the image and the frame.
The spatial arrangement of the elements on the wall is crucial for creating a balanced and visually appealing composition. There are several common arrangement styles, each with its own unique characteristics. A symmetrical arrangement, characterized by a balanced and mirrored layout, is often suitable for formal spaces. An asymmetrical arrangement, which is more informal and dynamic, involves positioning elements in a seemingly random but carefully considered manner. A grid arrangement, where elements are aligned in a uniform grid pattern, creates a clean and organized look. A salon-style arrangement, also known as a floor-to-ceiling arrangement, involves filling a large wall space with a dense collection of images and objects, creating a visually striking statement.
When arranging the elements, consider the spacing between the frames. Consistent spacing can create a sense of order and cohesiveness, while varying the spacing can add visual interest. A common guideline is to maintain a consistent gap of 2-3 inches between frames. However, this can be adjusted based on the size and style of the frames and the overall desired effect. Also, consider the size and orientation of the images when arranging them. Larger images should be positioned strategically to anchor the composition, while smaller images can be grouped together to create visual balance.
Hanging and Installation Techniques
The successful execution of a picture wall hinges on proper hanging and installation techniques. This involves accurately marking the placement of each frame, selecting appropriate hanging hardware, and securely attaching the frames to the wall. Attention to detail during this phase is crucial to ensure that the picture wall is both visually appealing and structurally sound.
Before hammering any nails or drilling any holes, accurately marking the placement of each frame is essential. Using the preliminary layout as a guide, carefully transfer the measurements to the wall. Use a measuring tape to determine the exact location of each frame and a level to ensure that it is perfectly straight. Mark the location for the nail or screw with a pencil. Consider using painter's tape to temporarily adhere the paper templates to the wall, allowing you to visualize the final arrangement before making any permanent marks.
Selecting the appropriate hanging hardware is critical for ensuring that the frames are securely attached to the wall. The type of hardware required will depend on the weight of the frames and the construction of the wall. For lightweight frames, small nails or picture hanging hooks may be sufficient. For heavier frames, screws and anchors may be necessary. For plaster walls, specialized picture hanging hooks designed for plaster may be required to prevent damage. Always consult the manufacturer's recommendations for the maximum weight capacity of the chosen hardware.
When hammering nails or drilling screws, exercise caution to avoid damaging the wall. Use a hammer with a comfortable grip and apply even pressure to drive the nail straight into the wall. When drilling screws, use the appropriate size drill bit and apply steady pressure to create a clean and even hole. If drilling into drywall, use drywall anchors to provide additional support. For plaster walls, pre-drilling a pilot hole is recommended to prevent cracking or crumbling. Ensure that the nail or screw is inserted deep enough into the wall to provide a secure hold, but not so deep that it damages the frame or the wall behind it.
After hanging each frame, double-check that it is level and securely attached to the wall. Use a level to ensure that the frame is perfectly straight and make any necessary adjustments. Gently tug on the frame to ensure that it is securely attached and does not wobble or shift. If the frame is not secure, consider using a larger nail or screw, or adding additional hanging hardware. Once all of the frames have been hung, step back and evaluate the overall composition of the picture wall. Make any final adjustments to ensure that the arrangement is balanced and visually appealing.

30 Stylish Bedroom Wall Decor Ideas And Tips

Desert Dreamer Boho Aesthetic Wall Collage Kit Vsco Girl Room Decor Dorm Photo Digital 100pcs

58 Best Wall Art Ideas For Every Room Cool Decor And Prints

Wall Collage Kit Aesthetic Pictures 70 Pcs Boho Decor Room Decorations For Living Bedroom Teen Girls Art Plants Photo 4x6 Inch
:strip_icc()/cdn.cliqueinc.com__cache__posts__268171__emily-henderson-target-design-advice-268171-1537395824654-image.700x0c-3bf5dbafc49045e5b14c9ad244891f94.jpg?strip=all "40 Best Living Room Wall Décor Ideas")
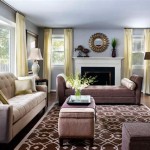
40 Best Living Room Wall Décor Ideas

Wall Collage Kit Vintage 50pcs Aesthetic Room Posters Bedroom Decor For Teen Girls 50 Photo Collages Dorm Com

25 Clever Bedroom Wall Decor Ideas To Make The Most Of That Blank Space Hunker Home Room

20 Bedroom Wall Decor Ideas To Spruce Up Your Space Displate Blog

20 Bedroom Wall Decor Ideas To Spruce Up Your Space Displate Blog

It S So Good To Be Home Print Living Room Decor Wall Art Above Couch Quote Bedroom Prints Set Of 2 Hallway